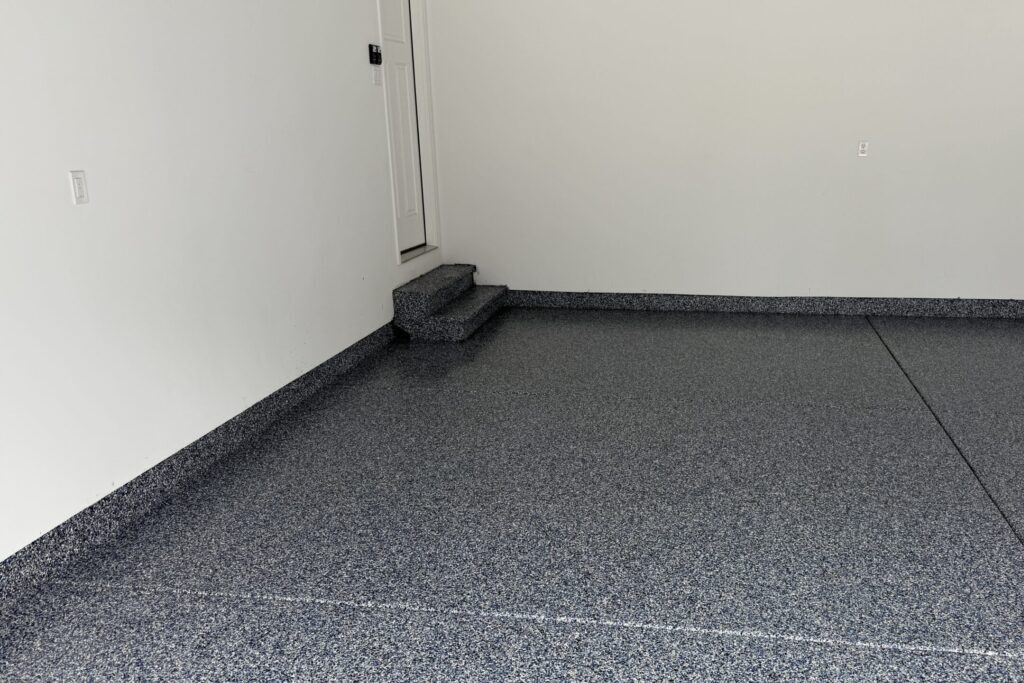
Epoxy garage floor coatings are a layered protective system on concrete. They use primer, epoxy resin, decorative flakes (if used), and a topcoat. Together these give you chemical resistance, wear protection, and a smooth finish. In Chicago, road salt, snow melt, and freeze-thaw cycles are common. Regular upkeep keeps those layers strong and stops dirt from weakening the bond or dulling the finish. This guide helps Chicago homeowners and light-commercial users clean, protect, troubleshoot, and know when to fix or recoat epoxy and related polyurea/polyaspartic coatings. You will learn a simple cleaning routine for local seasons. You will also learn step-by-step stain removal for oil, rust, and tire marks. Winter and spring prevention tips are included. Clear decision points help you choose DIY patching vs professional service. The sections below cover cleaning methods and safe products. They cover stain removal steps and emergency actions. They cover mats, sealers, and when to recoat. Together they help you extend the life and look of your garage floor coatings.
What Is the Best Way to Clean Epoxy Garage Floors in Chicago?
Cleaning an epoxy garage floor begins with removing loose debris, then performing a pH-neutral wet clean that preserves the resin topcoat and sealer while restoring slip resistance and appearance. Regular cleaning works because it prevents abrasive grit and corrosive salts from abrading the protective floor surface and migrating into joints or edges, which protects adhesion and limits micro-abrasion. The immediate benefit is sustained gloss and resistance to stains so the coating lasts longer and resists costly repairs. Implement this approach as a routine: daily or weekly dry debris removal followed by scheduled wet cleaning and seasonal deep cleans after winter. The next subsections explain which cleaners and tools are safe for epoxy and how often to perform each maintenance task.
Which Cleaning Products and Tools Are Safe for Epoxy Garage Floors?

Choosing the right products and tools prevents chemical or mechanical damage to the epoxy resin, primer layer, and surface prep. Start with a pH-neutral cleaner diluted per label directions, applied with warm water and agitated with a microfiber mop or soft-bristle broom; avoid acidic or strongly alkaline detergents that can etch or dull the finish. Soft tools-microfiber mop, soft-bristle push broom, squeegee, and a non-metallic scraper-remove soil without scratching the decorative flakes or topcoat. Use a wet vacuum or squeegee to remove rinse water, and test any stronger degreaser in an inconspicuous area before wider use. Choosing these epoxy-safe cleaners and tools protects the coating components and prepares surfaces correctly for occasional deeper cleaning or spot treatment.
Cleaning products comparison for common use cases:
| Cleaner Type | Recommended Dilution/Use | Best Use Case |
|---|---|---|
| pH-neutral floor cleaner | Follow label; generally 1-2 oz per gallon warm water | Routine weekly or monthly wet clean |
| Epoxy-safe degreaser | Spot-test first; use sparingly and rinse thoroughly | Heavy oil/grease spots |
| Mild dish soap solution | 1-2 tsp per gallon warm water | Light soiling, safe alternative for frequent mopping |
This table helps match cleaner strength to the job while reducing risk to the coating; always rinse and dry after use to avoid residue buildup.
How Often Should You Clean Your Epoxy Garage Floor for Optimal Longevity?
A maintenance cadence keyed to traffic, weather, and use patterns keeps epoxy coatings performing well and extends service life. For light residential garages, sweep daily or every few days and wet-clean weekly; for moderate to heavy use or commercial settings, sweep daily and deep-clean every 1-2 weeks, with monthly inspections for tracked salt or chemical spills. Seasonal actions matter in Chicago: remove salt residues promptly during winter, perform a spring deep clean to strip tracked de-icing materials, and inspect joints and edges after freeze-thaw cycles. Adjust frequency upward for visible spills, vehicle leaks, or tracked grit to prevent abrasion and staining. This schedule balances routine care with periodic deep interventions so coatings maintain adhesion, appearance, and protective function.
Routine cleaning guidance summary:
- Daily: Sweep or vacuum to remove grit and debris.
- Weekly: Wet-mop with a pH-neutral cleaner and rinse thoroughly.
- Monthly/Seasonal: Deep clean and check for stains, chips, or edge lift.
Regular cadence preserves the topcoat and reduces the need for repairs, and the next major section details stain-specific removal techniques.
How Can You Remove Common Stains from Epoxy Garage Floor Coatings?

Effective stain removal starts by identifying the stain type. Then choose an epoxy-safe method that removes dirt without harming resin or topcoat. Oil and grease need absorbents first, then an epoxy-safe degreaser and scrubbing. Rust needs a rust-dissolving product or mild rust remover. Test it in a small spot first. Tire marks often need a strong cleaner or scraping with a plastic tool. Safety and control matter for chemical spills. Ventilate the area, use protective gear, and neutralize corrosive agents when possible. That limits damage to the coating and concrete below. The sections below give step-by-step methods for each stain type. They also cover emergency actions for hot-tire pickup or hazardous spills.
What Are the Most Effective Methods to Remove Oil, Rust, and Tire Marks?
Match the stain type to method and tool for predictable outcomes while protecting the epoxy layers. For oil: blot fresh leaks with absorbent powder, then apply an epoxy-safe degreaser, agitate with a soft brush, and rinse; repeat if needed and allow to dry. For rust: apply a chelating agent or mild rust remover on a test patch, follow dwell time, scrub gently, and neutralize before rinsing to avoid etching. For tire marks: cool the tire-contact area if hot, use a plastic scraper to lift residues, and clean with a solvent-safe cleaner according to product guidance; repeated prevention is more effective than repeated removal. These targeted steps minimize mechanical and chemical risks to the coating and produce better cosmetic results.
Stain removal quick-reference (for on-the-spot actions):
- Oil and grease: absorb, degrease, agitate, rinse.
- Rust: test rust remover, apply, scrub gently, rinse.
- Tire marks: cool, scrape with plastic tool, then clean with strong cleaner.
Following these prioritized methods improves the chance of full stain removal without damaging epoxy, and the next subsection covers hazardous spills and bonded hot-tire marks that may require faster containment or professional help.
How Do You Handle Chemical Spills and Hot Tire Pickup on Epoxy Floors?
Immediate containment and safe neutralization prevent chemical aggression and long-term bond failures in the topcoat or primer layers. For chemical spills, isolate the area, ventilate, don PPE, and use absorbents to limit spread; neutralize acids or bases per safety guidance, then clean with epoxy-safe products and rinse. For hot-tire pickup, allow surfaces to cool, then use a plastic scraper and cleaning solvent formulated safe for epoxy; in severe bonding cases where the topcoat has pulled or blistered, avoid aggressive abrasives and seek professional assessment. When these issues extend beyond small spots or if the coating has started to peel, contact a nearby epoxy specialist for on-site evaluation. Knowing when to call for help prevents deeper substrate damage and keeps repairs manageable. Acting quickly and choosing the right removal approach reduces permanent damage and limits repair scope.
How Does Chicago's Climate Affect Epoxy Garage Floor Maintenance?
Chicago's seasonal extremes influence both the chemical and mechanical stress on epoxy coatings, as tracked road salt accelerates chemical attack while freeze-thaw cycles stress edges and joints. Salt and de-icing slurries contain chlorides that can be abrasive and retain moisture, which increases the chance of edge lifting or micro-delamination if left in place; snow and ice tracked indoors compound this effect. Seasonal inspection points include joints, garage door perimeters, and transition areas to uncoated concrete, since moisture migration and freeze-thaw stresses often show first at edges. The next subsections explain practical preventative measures for salt and freeze-thaw and how mats and sealers can mitigate these local risks.
What Preventative Measures Protect Epoxy Floors from Salt, Snow, and Freeze-Thaw Cycles?
Adopt a proactive, season-specific routine to keep corrosive salts and freeze-related moisture from undermining the coating's adhesion and surface integrity. After snowy or icy days, remove tracked salt promptly with a dry sweep then a pH-neutral wash to eliminate residues; inspect edges and joints for moisture intrusion and re-seal or patch small gaps before they widen. Use doormats to trap grit at entry points and deploy absorbent runners during high-salt periods to limit migration. Timely detection and simple preventive actions-cleaning salted areas within 24-72 hours and maintaining seals-lower the chance of costly edge delamination and preserve the coating's protective layers.
Recommended seasonal checklist to reduce climate impact:
- Remove tracked salt within 24-72 hours.
- Use entry mats to capture grit and slurry.
- Inspect and patch edges after thaw cycles.
Taking these steps cuts the risk of freeze-thaw damage. It also prepares the floor for recoating when needed.
How Can Floor Mats and Sealers Extend Epoxy Floor Durability in Chicago Weather?
Floor mats and supplemental sealers act as protective layers and barriers. They reduce direct contact between the topcoat and grit, salt, and moisture. Choose absorbent, grit-capturing mats at doorways and under vehicle tires when snow or road salt is expected. Place runners to protect high-traffic areas. Clean mats regularly so they do not become secondary dirt sources. In high-exposure zones, an extra UV- and chemical-resistant topcoat or sealer can improve grip and chemical resistance. How often you reapply depends on traffic and exposure. Keeping mats clean and reapplying protective topcoats on time preserves the epoxy. It limits direct damage to the resin and decorative layers.
Mat and sealer maintenance tips:
- Clean mats weekly during winter months.
- Inspect sealer wear annually or after severe seasons.
- Replace mats that retain salts or oils that cannot be fully removed.
These strategies reduce wear and extend the coating's useful life. That leads into when to repair or recoat.
When to Repair or Recoat Your Epoxy Garage Floor
Deciding to repair or recoat depends on visible wear, worsening performance, and how much damage there is. Timely small repairs avoid larger, costlier fixes later. Surface scratches, small chips, and minor wear are often fixable with patch kits or light sanding and touch-up. Widespread peeling, bubbling, or stains that won't come clean signal the need for professional help. You may need partial or full recoating. Recoating restores chemical resistance, UV protection, and look. Understanding the expected lifespan of epoxy coatings helps homeowners plan upkeep and avoid early wear. The sections below give a repair decision checklist. They also explain how recoating improves longevity and appearance.
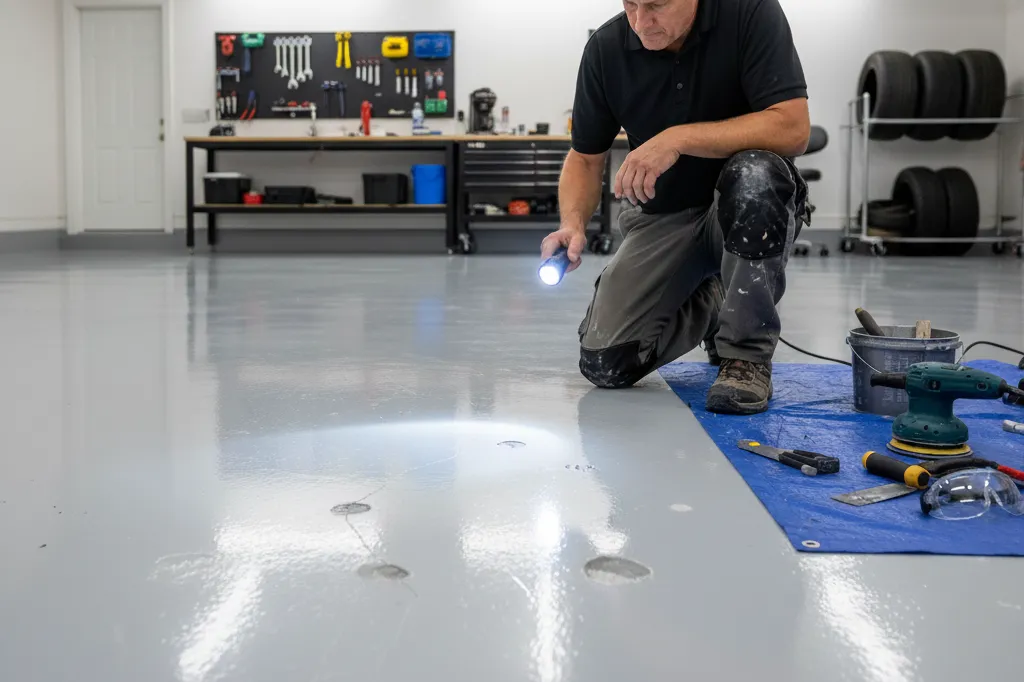
What Are the Signs That Indicate Minor Repairs or Professional Maintenance Is Needed?
Assess the floor with a simple checklist. It helps you tell cosmetic wear from coating that is peeling off. That way you choose the right fix. Minor signs are surface scratches, small chips, or small stains. These are often fine for DIY patching with epoxy repair kits. Clean well and lightly rough the surface so the patch bonds. Warning signs for professional service include widespread peeling, blistering in big areas, and stains that resist safe removal. These point to deeper bond issues beyond simple spot repairs. When in doubt, take photos and talk to a professional. That avoids DIY fixes that don't work. Some can make peeling worse or trap moisture under new material.
Repair decision checklist (visual indicators):
- Small scratches/chips: DIY patch feasible.
- Isolated stains: attempt spot treatment with degreaser.
- Widespread delamination/blistering: professional evaluation needed.
Understanding these thresholds helps protect your investment and informs whether a recoat or targeted repair is appropriate.
How Does Recoating Improve Epoxy Floor Longevity and Appearance?
Recoating refreshes the protective topcoat. It restores gloss and chemical resistance. It can extend the coating's life by sealing small scratches and renewing UV protection when needed. The process needs good surface prep. Clean, degrease, and lightly rough the existing surface. That creates grip for the new coat to bond. Preparation quality determines the outcome. A good recoat improves slip resistance. It hides color fading. It reduces soaking in of oils and salts. It often adds several years to the coating's useful life when combined with regular upkeep. For larger jobs or peeling that won't stop, a pro recoat or full reinstall may be best. That ensures good long-term performance.
Repair types and expected outcomes:
| Repair Type | Severity Indicator | DIY Feasible? |
|---|---|---|
| Scratch/Chip Patch | Isolated surface damage under 3 in. | Yes, with kit and prep |
| Localized Recoat | Worn edges or small zones | Sometimes, pros advised |
| Full Recoat/Replacement | Widespread delamination or surface failure | Professional service recommended |
This comparison shows which fixes extend life best for the cost. It also shows when to hire pros for durable long-term results.
Research on epoxy surface treatments shows they work well for durability and grip. That matters for garage floors in harsh conditions. Tests of these high-friction treatments show they can perform well long-term when applied and maintained correctly.
Epoxy Resin Surface Treatments: Durability and Skid Resistance Durability and skid resistance of high friction surface treatments with modified epoxy resin: Experimental characterization Durability and skid resistance of high friction surface treatments with modified epoxy resin: Experimental characterization, B Shen, 2025
Concrete Shield Coatings Inc. offers epoxy and polyurea-polyaspartic coating systems made for the Chicago climate. They provide durable flake and solid color epoxy options. These focus on long-lasting resistance to stains, wear, and chemicals. As a local provider, they emphasize coatings and topcoats made for low upkeep and long life. They can evaluate bond problems or do recoats when DIY options are not enough. If a floor shows widespread peeling or repeated hot-tire sticking, a professional assessment can help. A coating specialist can give a cost/benefit analysis and a fix plan. That restores protection and appearance. You can reach out for an inspection when surface issues go beyond spot repairs. Contact them if you're unsure whether recoating or full replacement is the better long-term choice.
- When to consult a professional: persistent peeling, large-area damage, hazardous chemical exposure.
- Benefits of professional recoating: restored resistance, improved aesthetics, and extended lifespan.
- Practical ROI: timely maintenance and targeted recoats reduce long-term replacement costs.
This guidance helps Chicago owners choose between DIY patching and expert intervention to protect their garage floor investment